Backend settings
Plugin setting
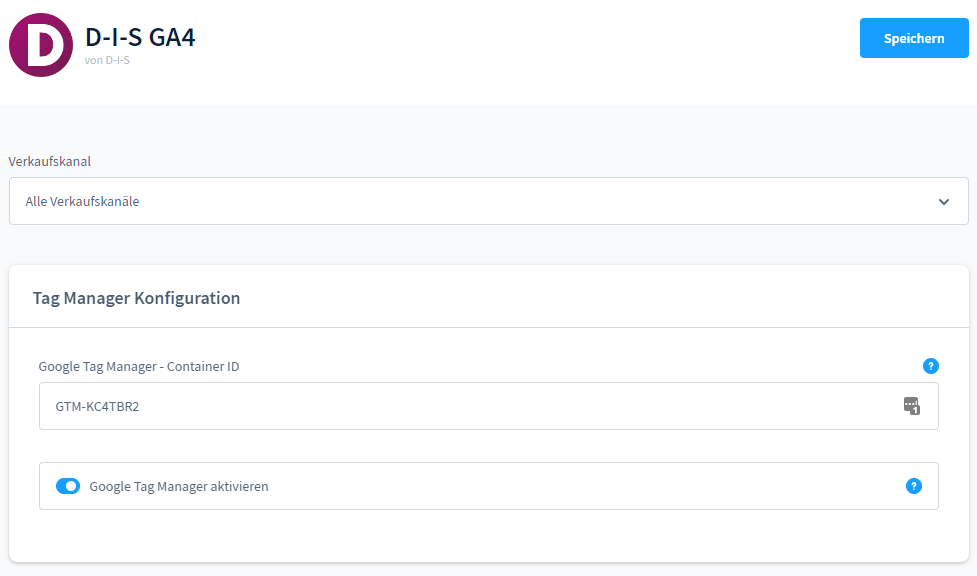
In the backend of your Shopware store, navigate to the plugin and click configuration. In the first menu you have the possibility to set the sales channel.
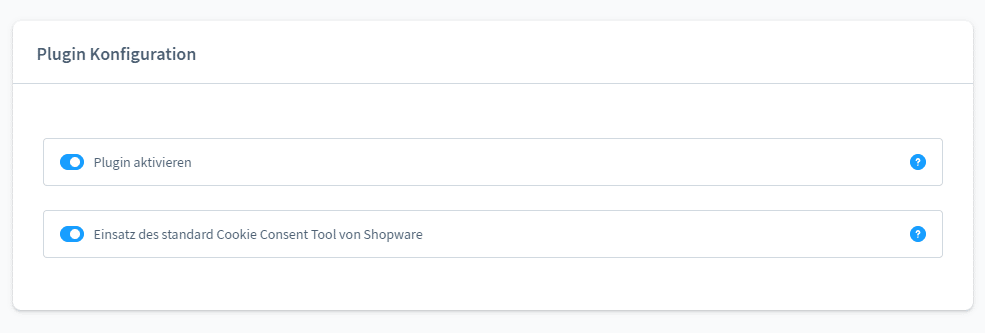
You have as first option to activate and deactivate the plugin. This is important if you have different sales channels. If you use the standard Cookie Consent Tool from Shopware you can leave the option “Use the standard Cookie Consent Tool from Shopware” enabled. However, if you use another cookie consent tool you can disable the option. You can also disable the option if you are not selling in the EU, for example in Switzerland.
ATTENTION: If you use another Cookie Consent solution you have to adjust the triggers in the Tag Manager.
Tag Manager Settings
In the backend of your Shopware store, navigate to the plugin and click configuration. In the first menu you have the possibility to set the sales channel. In the “Google Tag Manager – Container ID” field, enter your Tag Manger Container ID in the following format: “GTM-XXXXXXX” and leave the Tag Manager enabled to run.
Googel Analytics settings
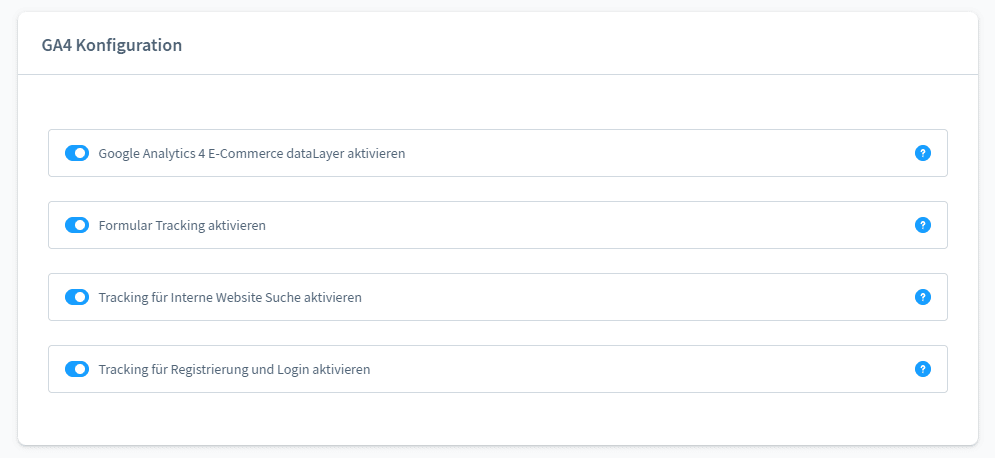
Enable Google Analytics 4 E-Commerce dataLayer
This enables the DataLayer with all the e-commerce properties for Google Analytics 4 like: “add_payment_info, add_shipping_info, add_to_cart, add_to_wishlist, begin_checkout, purchase, remove_from_cart, select_item, view_cart, view_item, view_item_list“
The DataLayers have the new GA4 DataLayer format.
Enable form tracking
This setting will track the contact forms with the event “generate_lead“.
Enable tracking for internal website search
y enabling the option, the event”search” will be recorded for an internal website search. Additionally the dimension “search_
Enable tracking for registration and login
y enabling this option every time a user registers the event “sign_up” will be fired. Also as soon as a user logs in the event “login“.
Google Analytics 4 settings
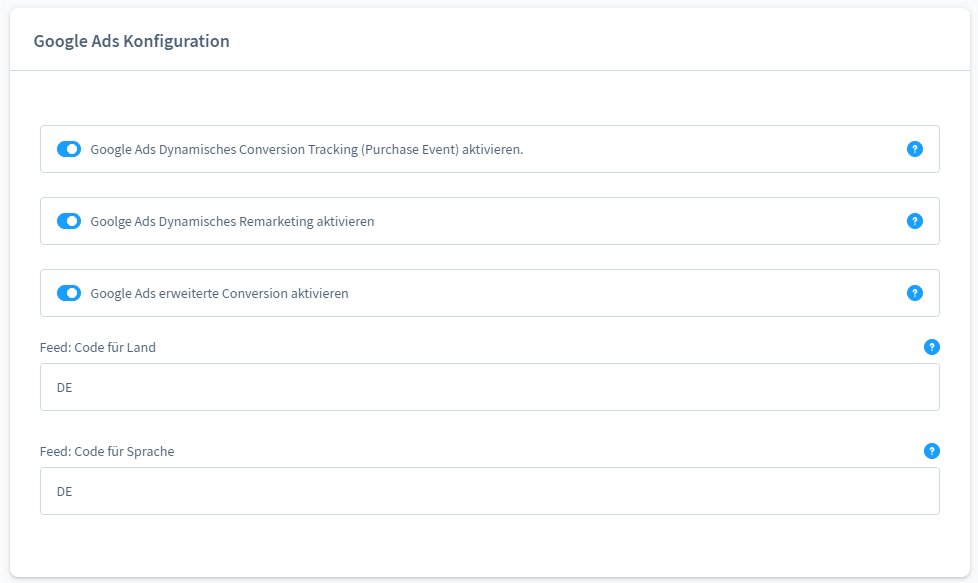
Enable Google Ads Dynamic Conversion Tracking (Purchase Event).
This option enables the classic purchase event for Google Ads with the corresponding DataLayer.
Goolge Ads Enable Dynamic Remarketing
nabling dynamic remarketing will fire the DataLayer for the following events: “view_item“, “add_to_cart “, “view_item_list“, “view_search_results” and “purchase”.
Enable Google Ads advanced conversion
By activating these options the advanced conversion tracking will be enabled. This improves the attribution of the conversion more information you can get here. Please note that you should adjust your privacy setting for this.
Feed: Code for Country & Feed:
The two options refer to the Merchant Center feed to determine your profit in Google Ads. You can learn more at the link.
User ID Tracking
By enabling User Id tracking, your data will become more accurate in Google Analytics as well as in Google Ads. Especially the Customer Live Time Value of a user becomes much more accurate and enables cross-device tracking as soon as a user logs in. Please note that you need to make settings in Google Analytics and Google Ads to enable this.
You can get more information about User ID Tracking here.
Download the container setting for the Tag Manager
To enable a quick implementation of the plugin you can download the Tag Manager container with all configurations and import it into your Tag Manager. You will learn how this works in the next section.
Click the button and download the container file. In this container file all tags, variables and triggers are already created.
ATTENTION: You need to change your ID for Google Analytics and Google Ads.
There are two different container versions. One for stores with the standard Shopware Cookie Banner and the other without Shopware Cookie Banner or external Cookie Banner Tool.
Shopware Standard Cookie Banner
Without cookie banner (Switzerland) or with external cookie tool
Import of the Tag Manager Container
Click the button and download the container file. In this container file all tags, variables and triggers are already created. If you haven’t created a Tag Manger yet, you can find instructions here.
ATTENTION: You need to change your ID for Google Analytics and Google Ads.
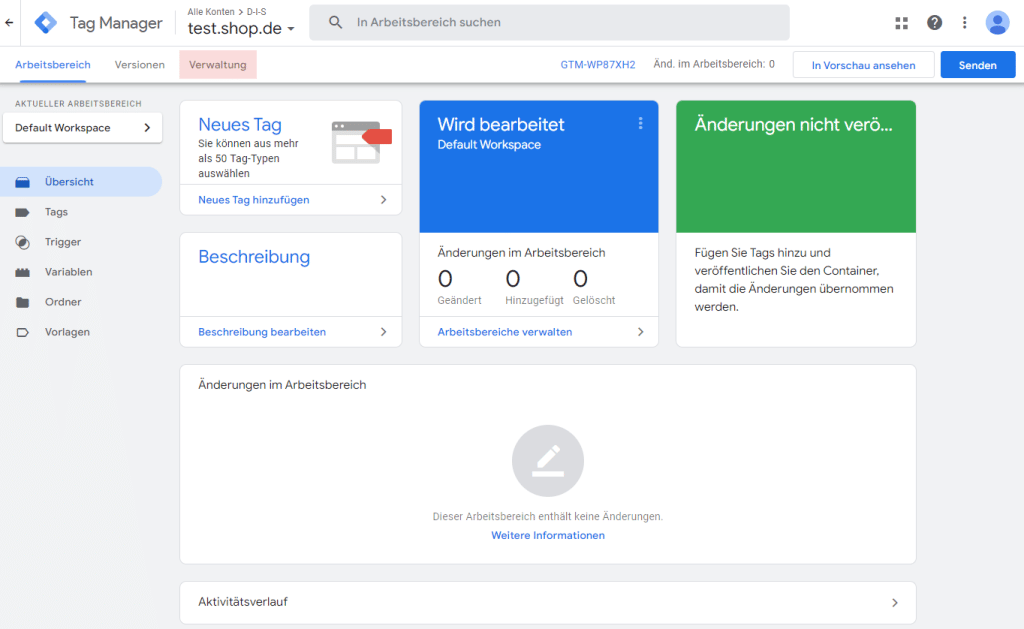
Go to your Tag Manager and navigate to the Home page. Go to your Tag Manager and navigate to the Home page.
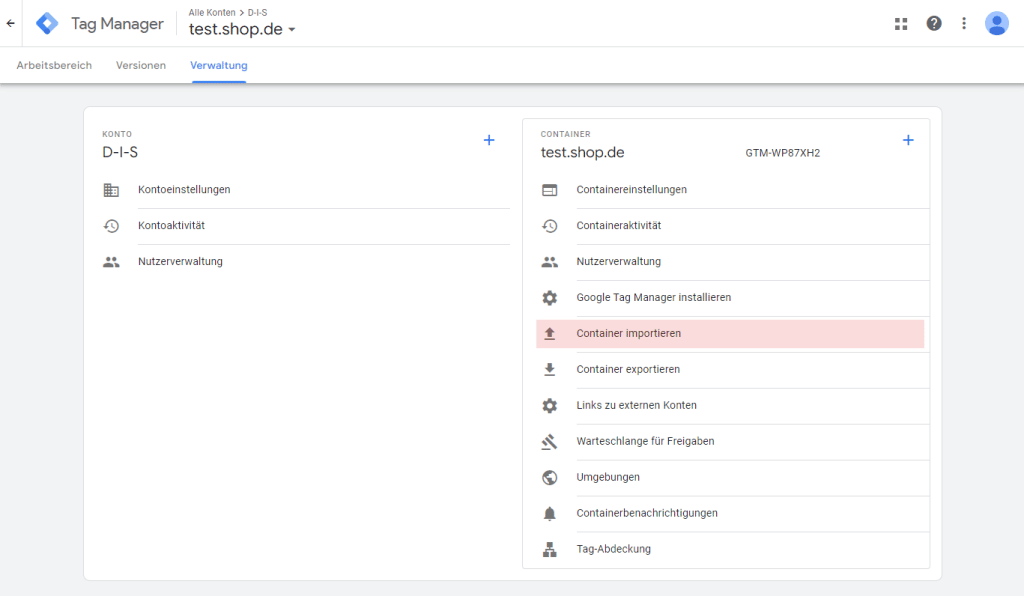
In the management menu you should go to the “Containers” column and click on the “Import containers” menu item. Check if they are in the correct container.
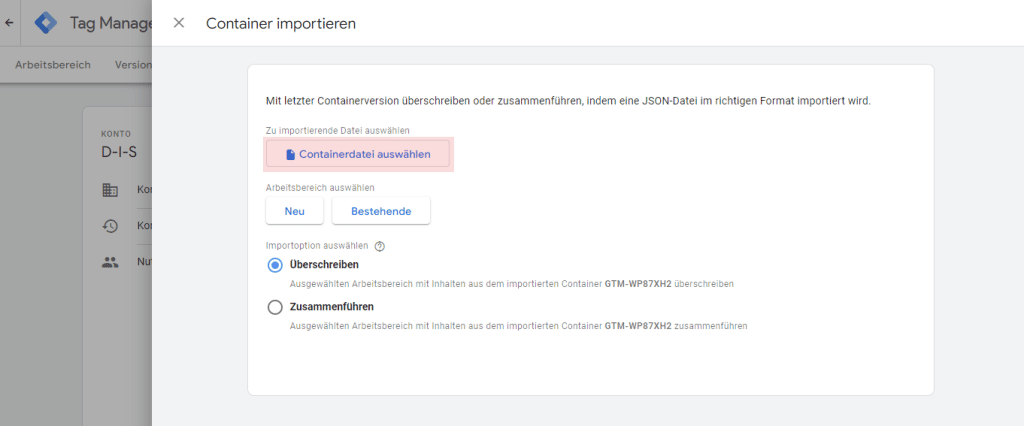
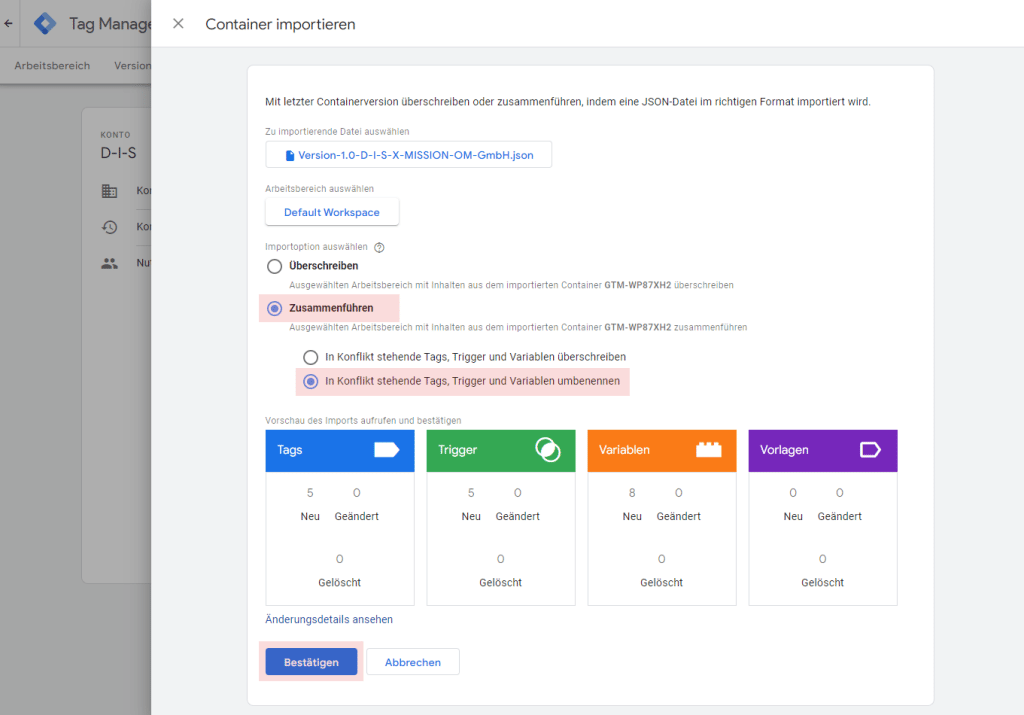
Click “Select container file” and select the previously downloaded file.
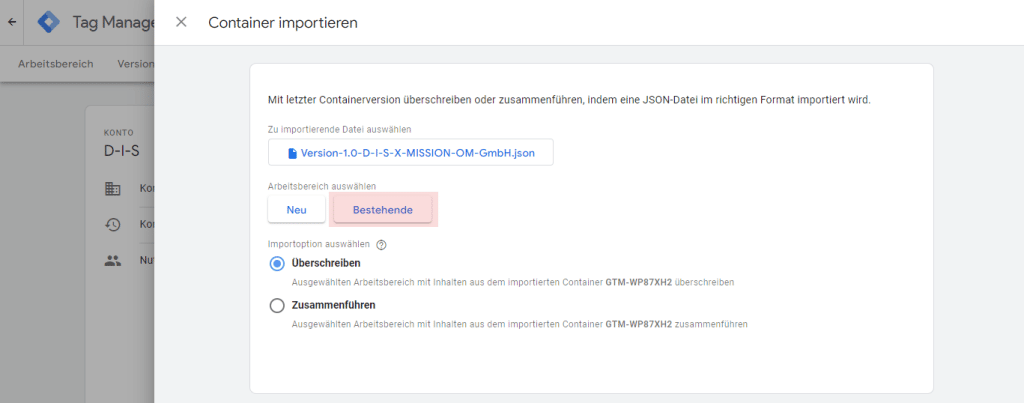
Click the “Existing” button at “Select workspace”. This allows you to import the container into the Current Workspace.
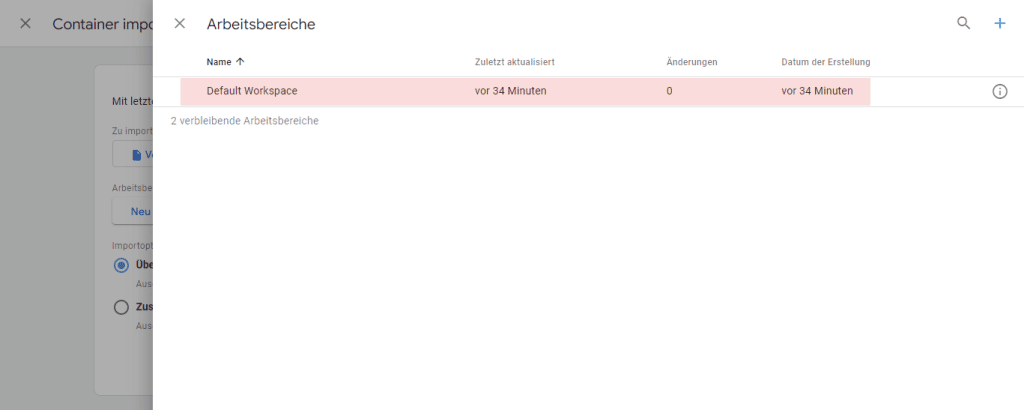
A slide-in menu opens. Click here on the “Default Workspace” it may be that the workspace has been named differently for you. You would then have to select them.
Click on “Merge” in the radio buttons of “Select import option” so that your already existing tags are not deleted. At the second selection of under “Merge” click “Rename conflicting tags, triggers and variables”. Now you can confirm your selection. Now all tags, variables and triggers have been imported.
Change ID's in the Tag Manager
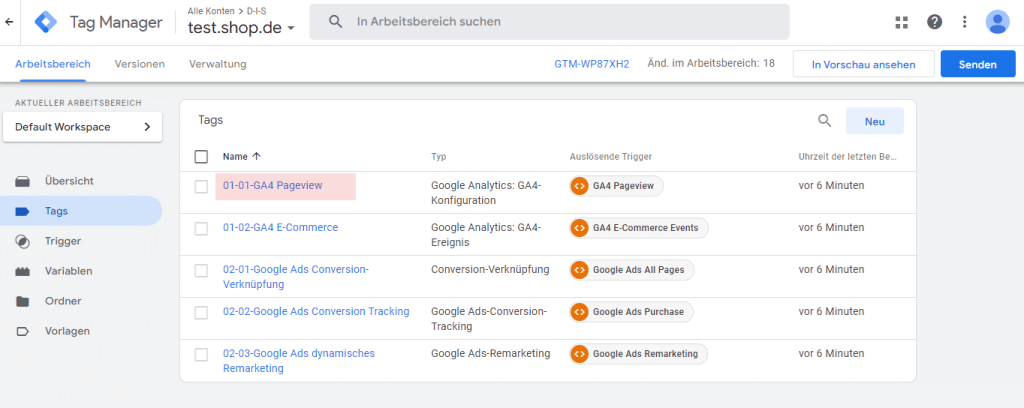
For your tags to work it is necessary to exchange the ID’s. To do this, click on the tag “01-01-GA4 Pageview”.
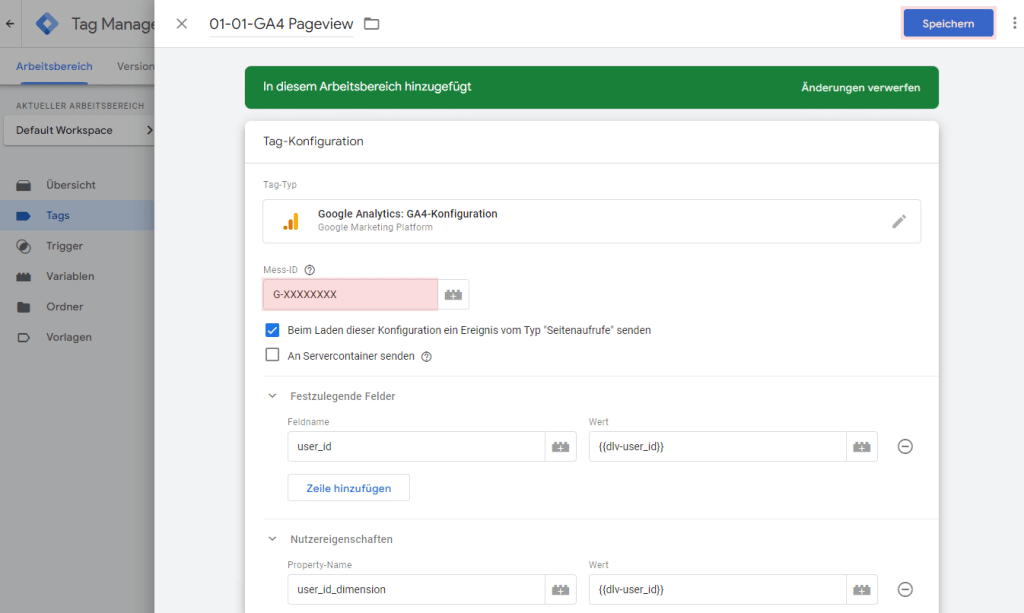
Change the measurement ID with your Google Analytics Stream ID and then save your setting.
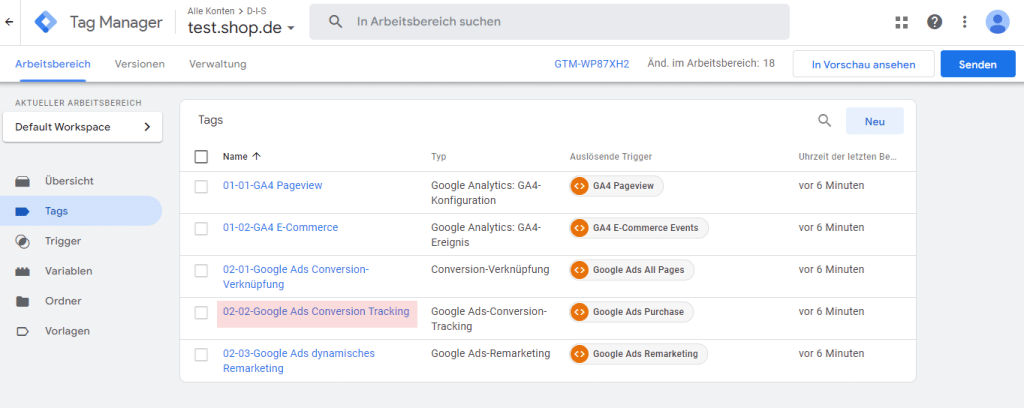
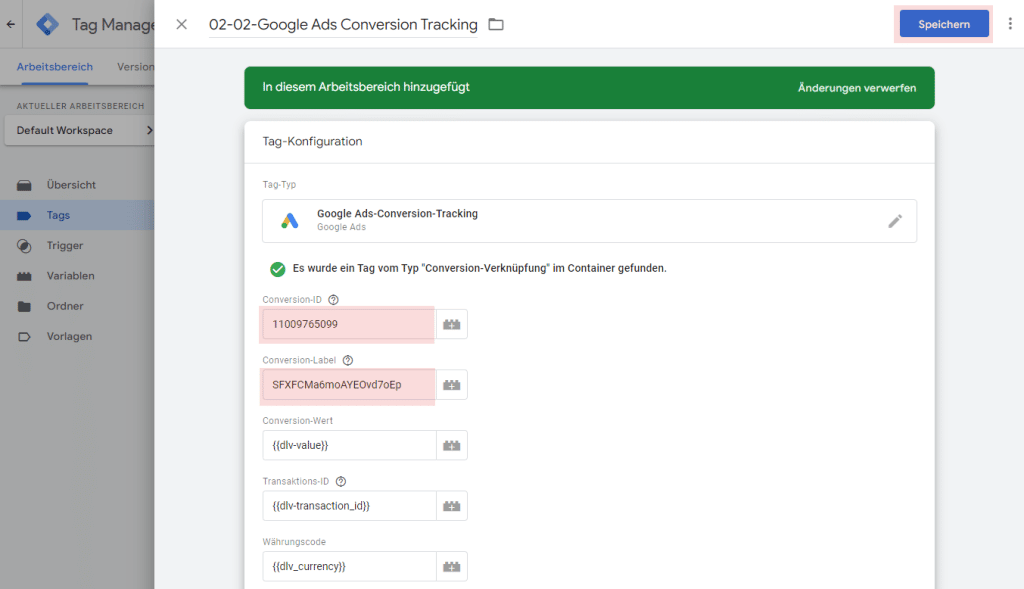
Open the tag “02-02-Google Ads Conversion Tracking”.
Tauschen Sie die “Conversion-ID” und das “Conversion-Label” mit Ihren ID’s aus und klicken Sie auf “Speichern”.
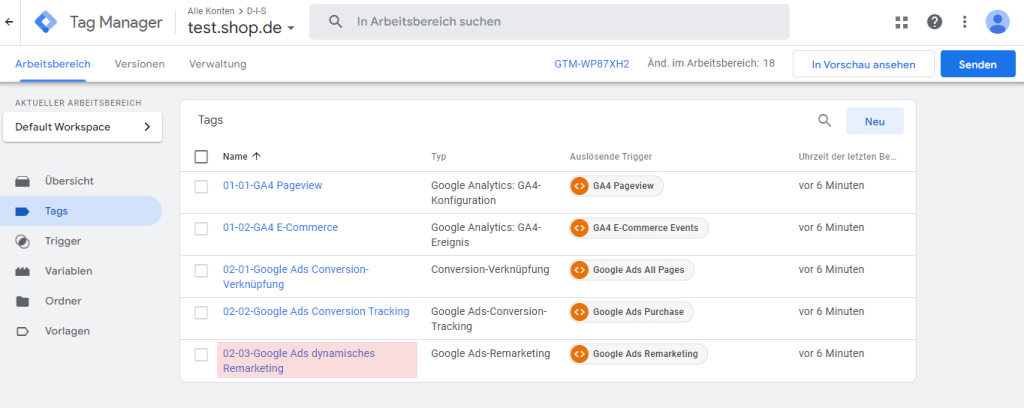
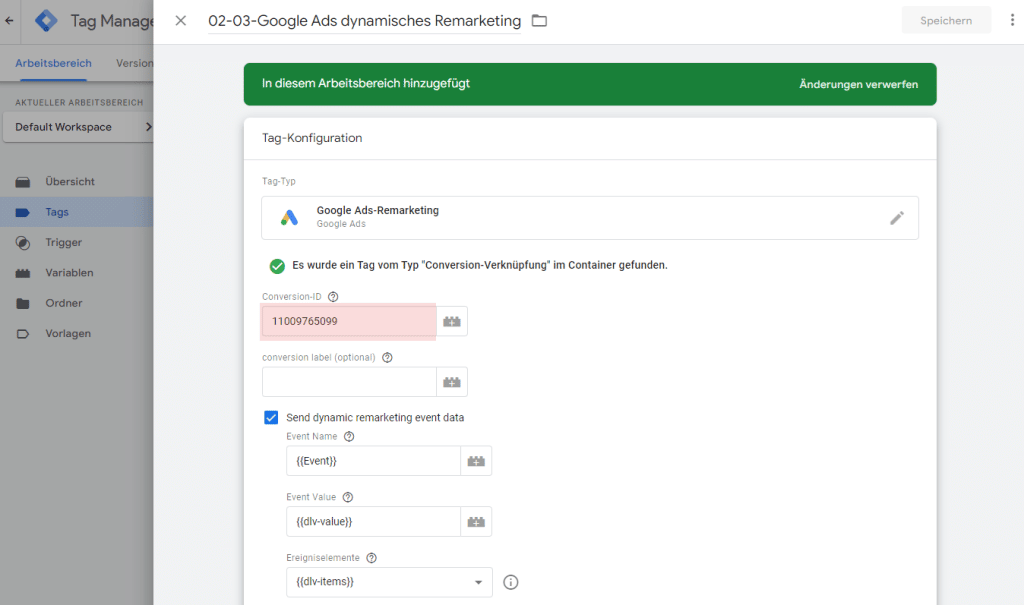
Open the tag “02-03-Google Ads dynamic remarketing”.
Swap the conversion ID with the conversion ID from your Google Ads account and “Save” the tag.
GA4 - User ID Tracking
Create User ID Tracking in Google Analytics 4
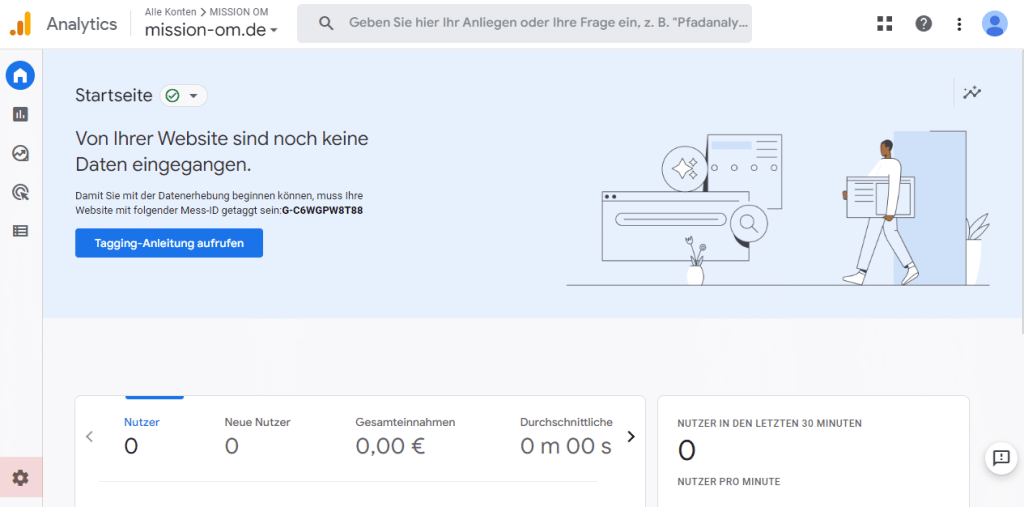
Öffnen Sie Google Analytics und klicken Sie auf das Zahnrad unten links um in die Einstellungen zu gelangen.
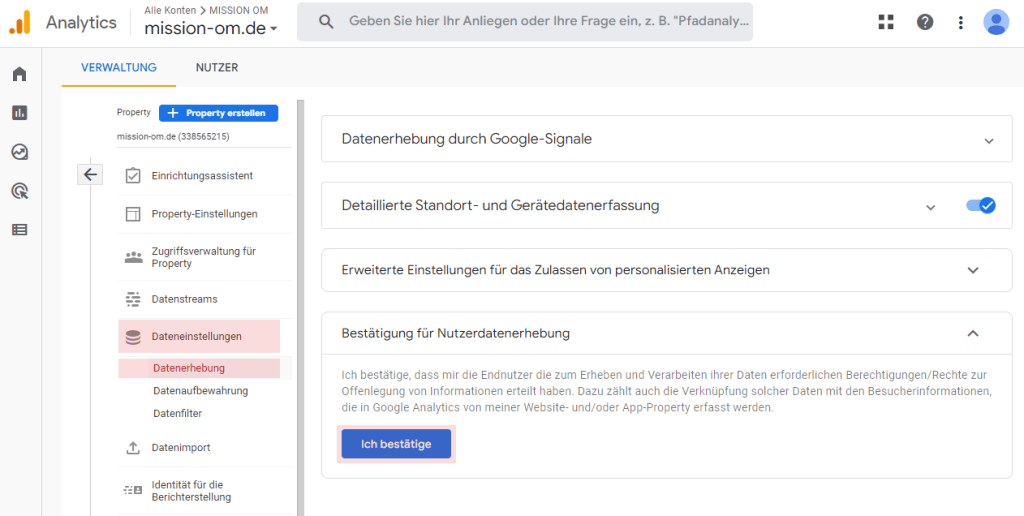
Navigieren Sie zur Spalte „Property“. Klicken Sie anschließend auf „Dateneinstellungen“ und dann auf „Datenerhebung“ anschließen müssen Sie die „Bestätigung für Nutzerdatenerhebung“ bestätigt werden. Ab diesen Zeitpunkt werden die User IDs in Google Analytics verarbeitet.
Google Ads Setup
Create revenue tracking in Google Ads account
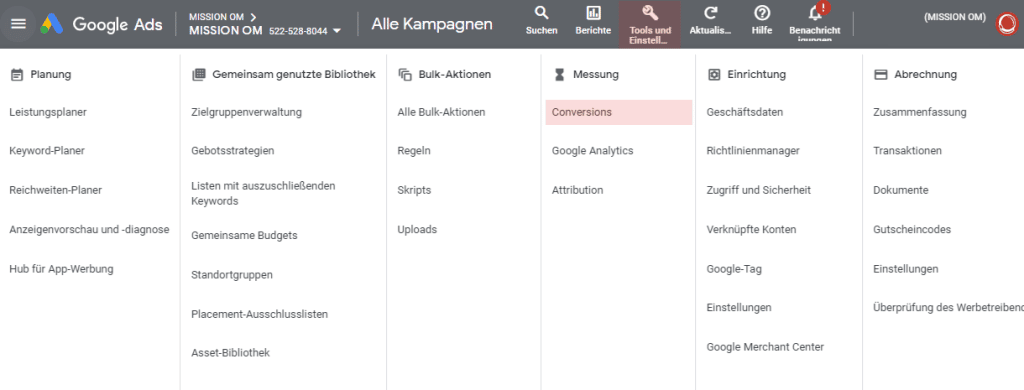
Um ein Converion Event in Google Ads anzulegen klicken Sie auf „Tools und Einstellungen“ und anschließend in der Spalte Messung auf Conversion.
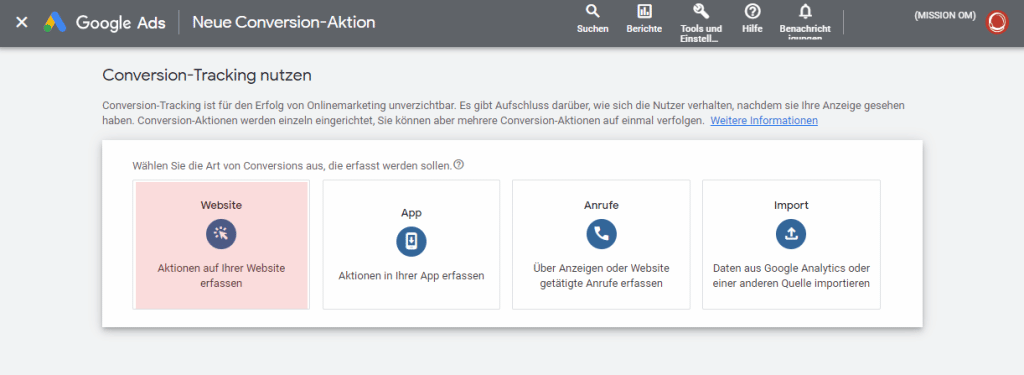
Klicken Sie auf den Button „Website“.
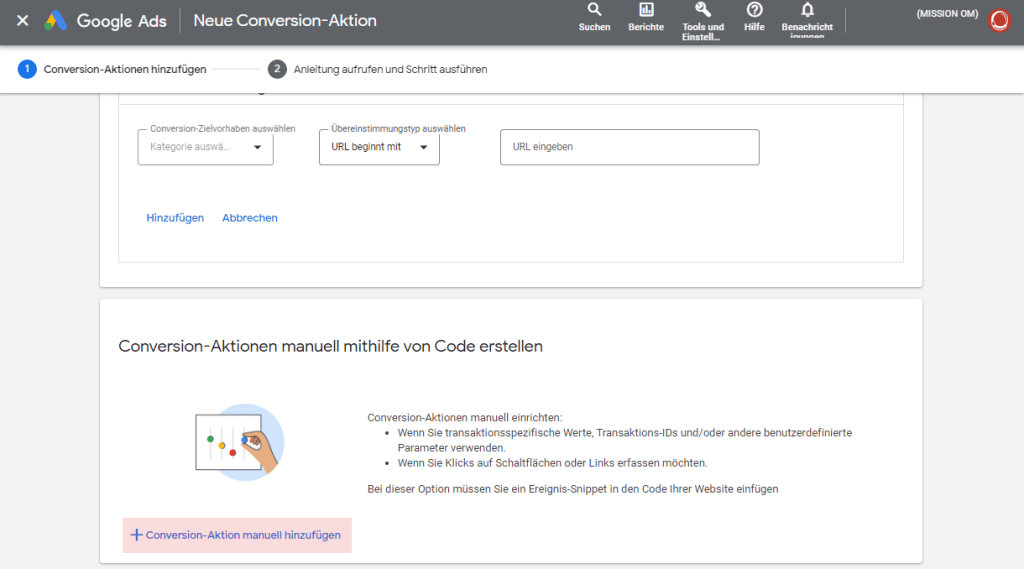
Scrollen Sie in den unteren Bereich bis zum Abschnitt „Conversion-Aktionen mithilfe von Code erstellen“ und klicken Sie anschließend auf den Text „+ Conversion-Aktion manuell hinzufügen“
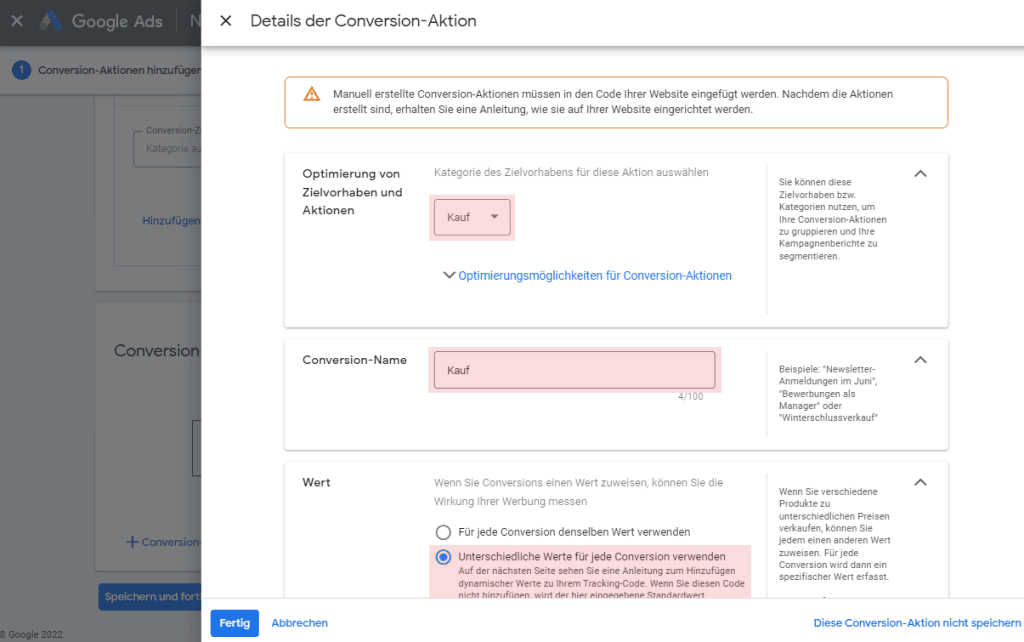
Wählen Sie beim Punkt „Optimierung von Zielvorhaben und Aktionen“ die Option „Kauf“ aus. Den „Conversion-Name“ können Sie benennen wie Sie wollen wir empfehlen „Kauf“ zu nehmen. Beim Bereich Wert muss die Option „Unterschiedliche Werte für jede Conversion verwenden“ da ansonsten keine dynamischer Umsatz übergeben werden kann
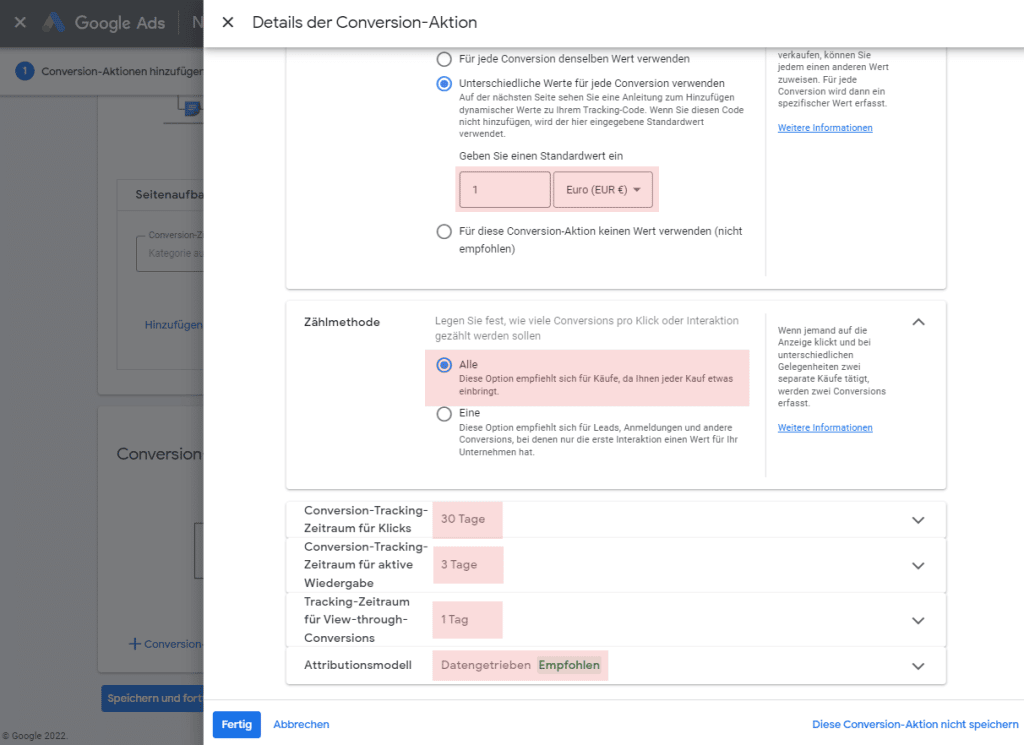
Die Option Standartwert kann so belassen werden, da es keinen Kauf ohne Umsatz geben kann. Bei der Zählmethode ist es wichtig, dass „Alle“ ausgewählt ist, da ansonsten Umsätze von Usern die mehrmals im Webshop kaufen nicht erfasst werden. Die anderen Einstellungen können so belassen werden. Klicken Sie Anschließen auf „Fertig “.
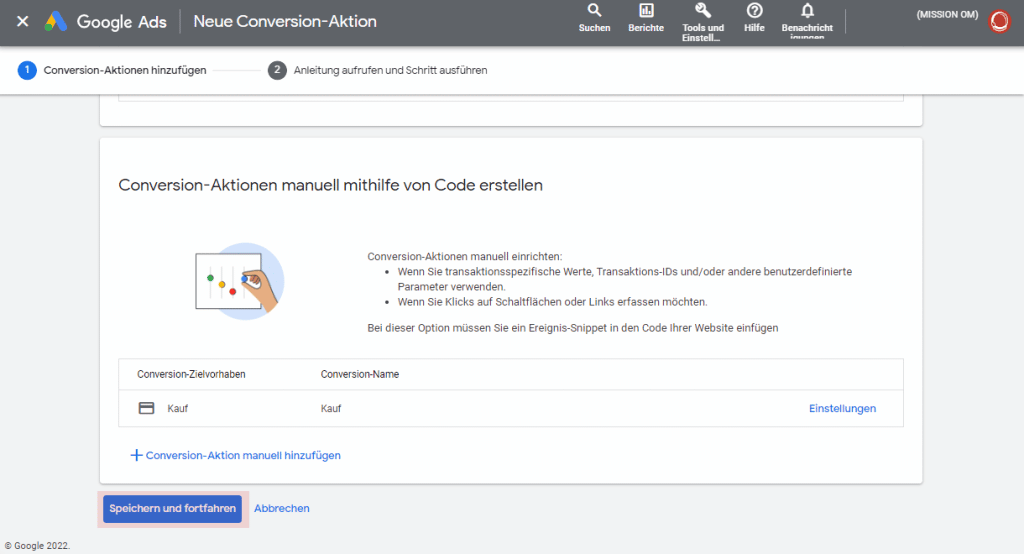
Nach den getroffenen Einstellungen srollen Sie nach untern und klicken Sie auf „Speichern und fortfahren”.
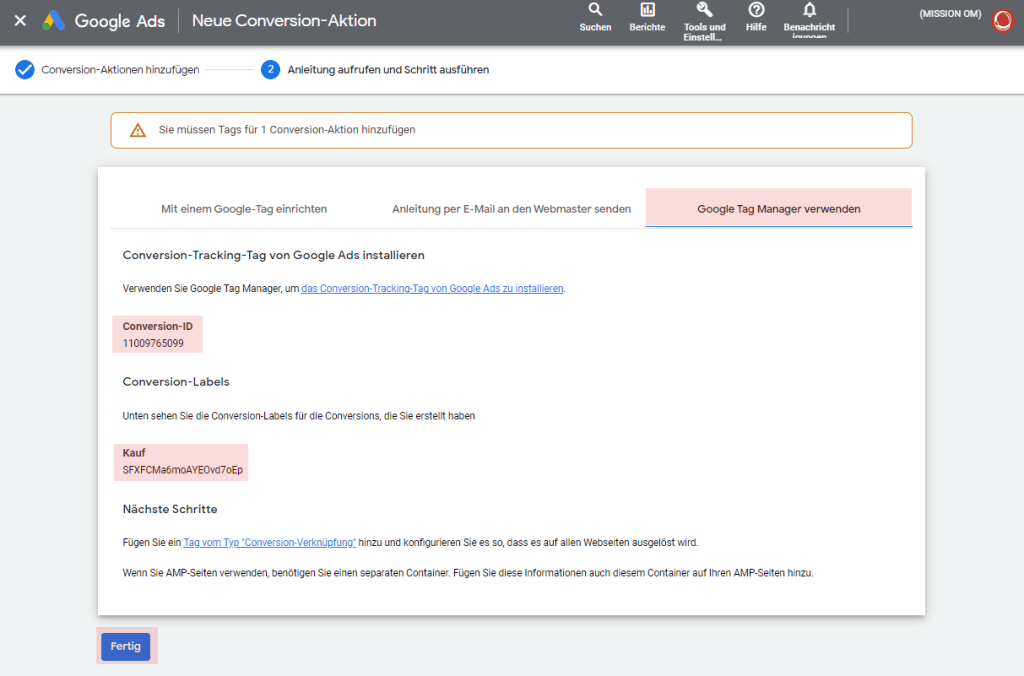
Klicken Sie in der Tab Naviagtion auf „Google Tag Manager verwenden“. Kopieren Sie sich die „Conversion-ID“ und das „Conversionlabel“ und anschließen auf den Button „Fertig“. Nun muss nur noch das Tracking für das Umsatz Tracking im Google Tag Manager eingerichtet werden.
Create User ID Tracking in Google Ads account
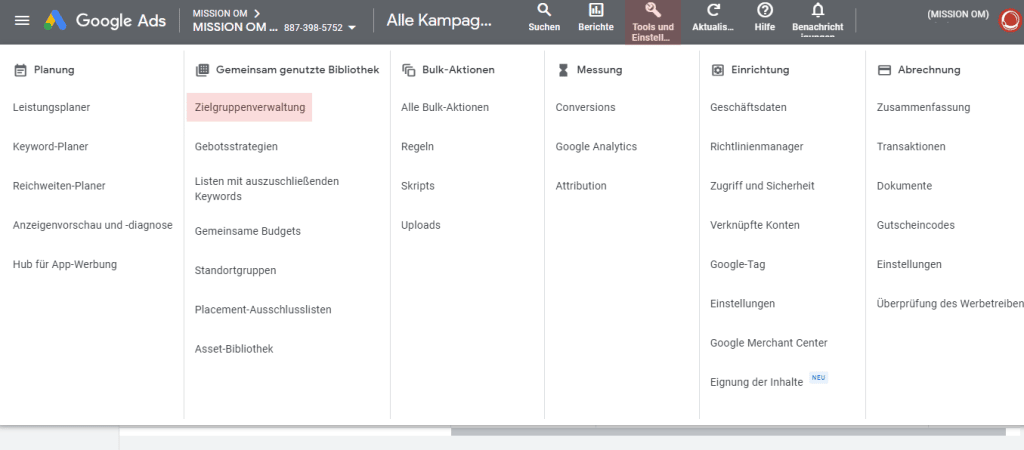
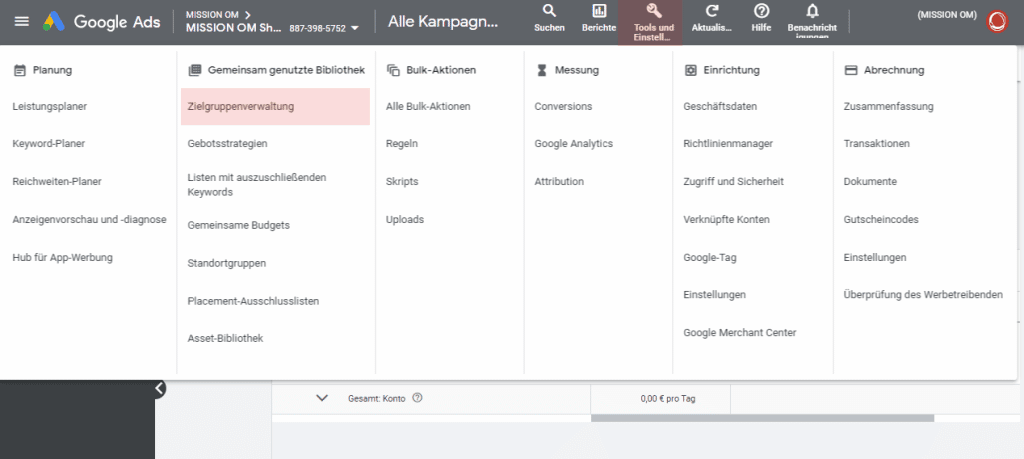
Begeben Sie sich in Ihr Google Ads Konto und Klicken Sie auf “Tools und Einstellung” und in der Spalte”Gemeinsam genutzte Bibliothek” auf “Zielgruppenverwaltung”.
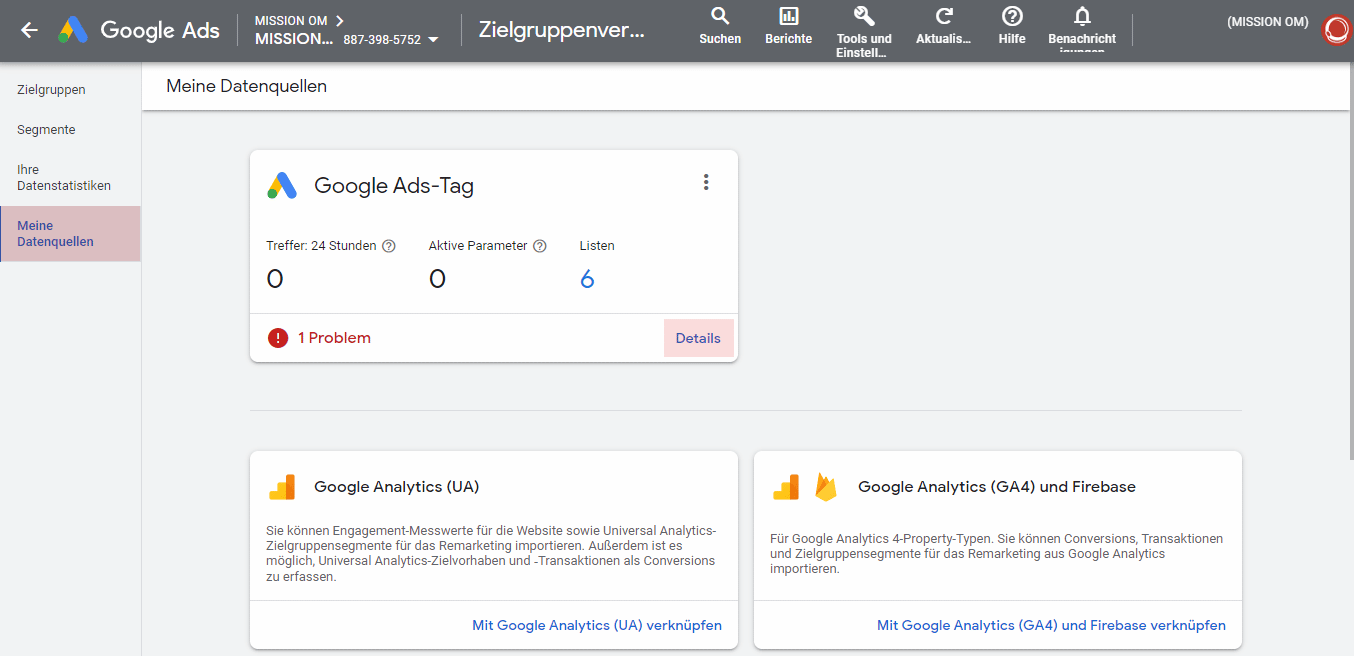
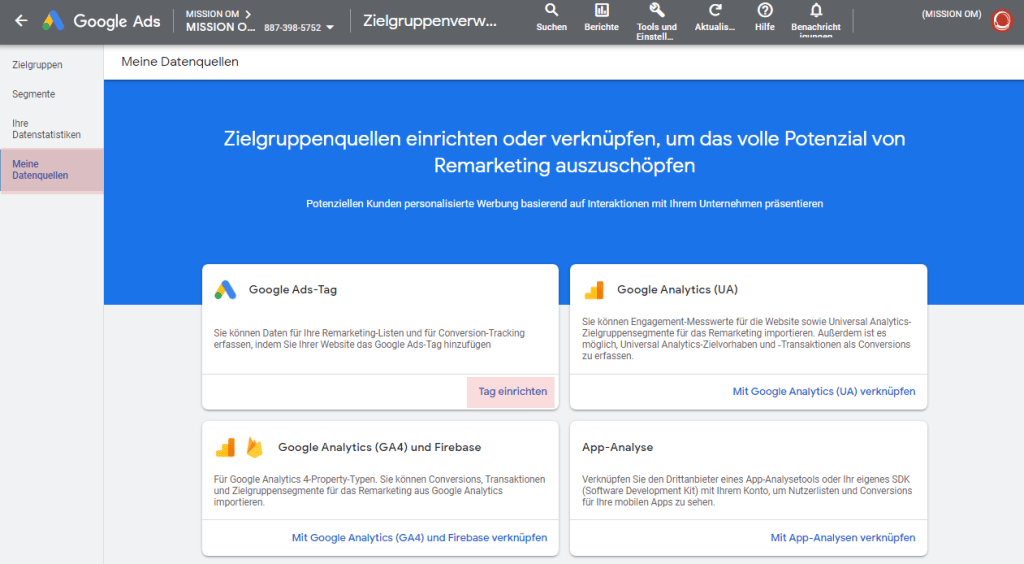
Begeben Sie sich zu dem Menüpunkt “Meine Datenquelle”. Klicken Sie bei der Datenquelle “Google” Ads auf “Details”.
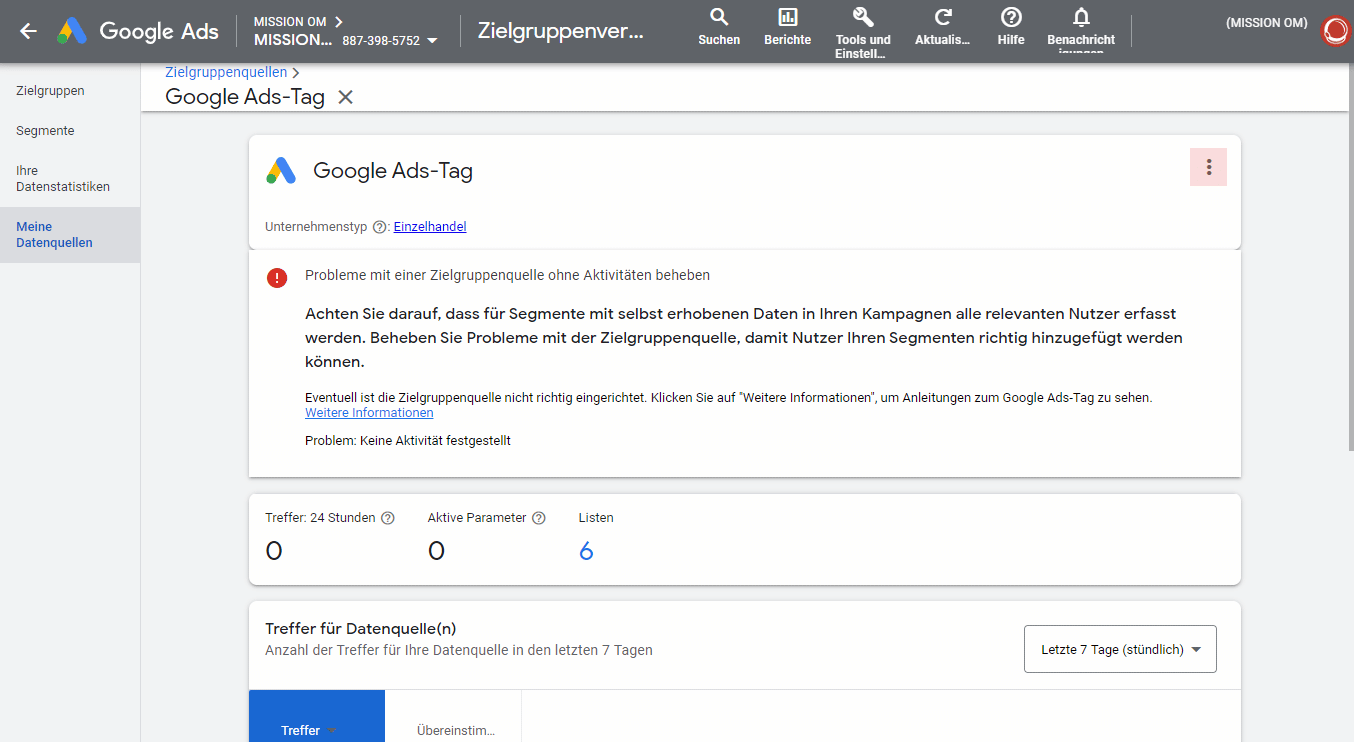
Klicken Sie bei der Daten Quelle Google Ads oben rechts auf das erweiterte Menü.
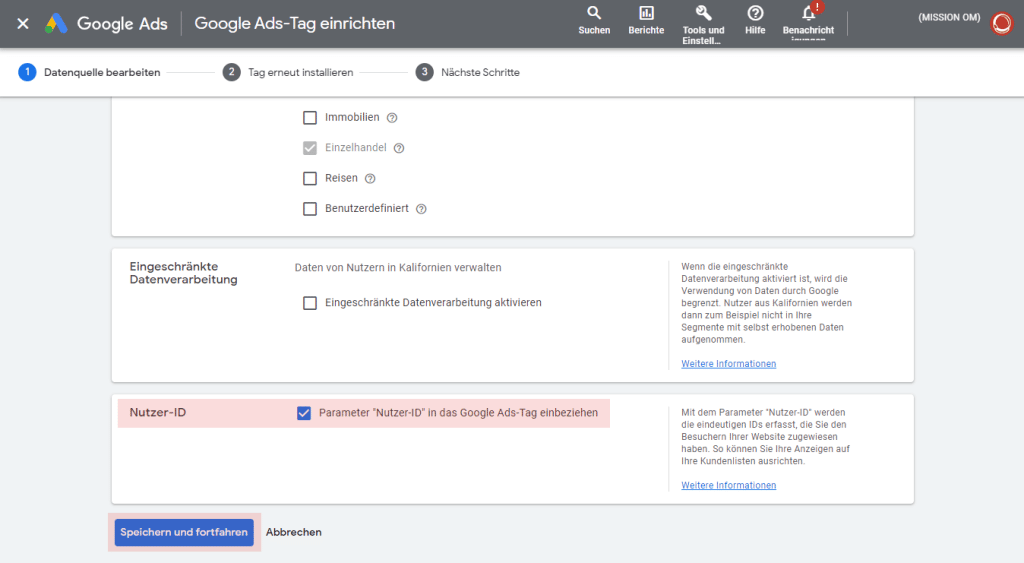
Scrollen Sie in den Einstellung nach untern und klicken Sie auf “Erweiterte Einstellungen”
Aktivieren Sie mit dem Häckchen “Parameter “Parameter “Nutzer-ID” in das Google Ads-Tag einbeziehen” und klicken Sie auf “Speichern und fortfahren”.
Create dynamic remarketing in Google Ads account
Um das dynamische Remarketing in Google Ads zu aktivieren müssten folgende Schritte gemacht werden. Loggen Sie sich in den Google Ads Account ein und klicken Sie auf „Tools und Einstellung“ und anschließend in der Spalte „Gemeinsam genutzte Bibliothek“ auf den Text „Zielgruppenverwaltung“.
Klicken Sie im linke Bereich auf „Meine Datenquellen“ und anschließend auf „Tag einrichten“ in der Sektion „Google Ads-Tag“
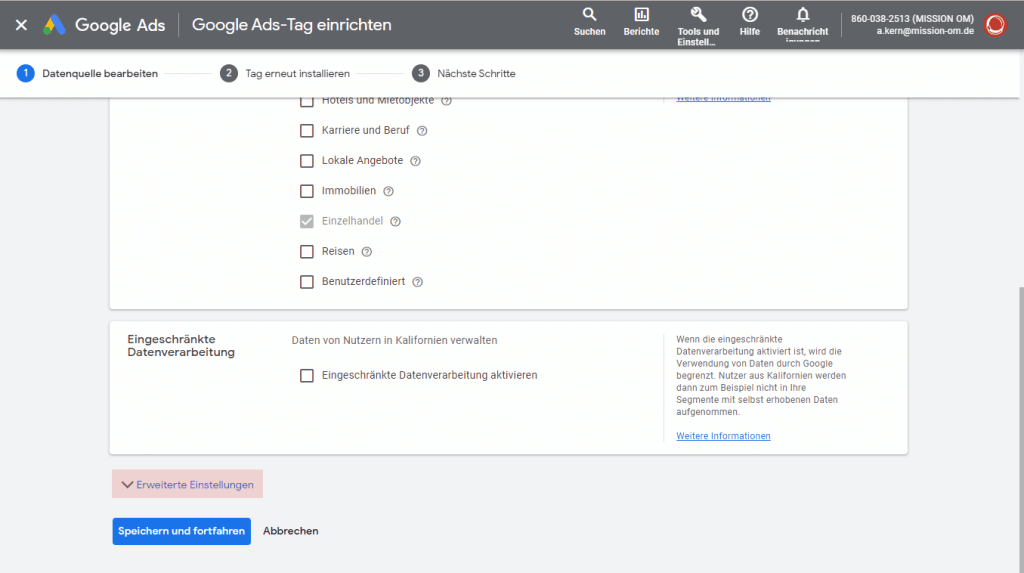
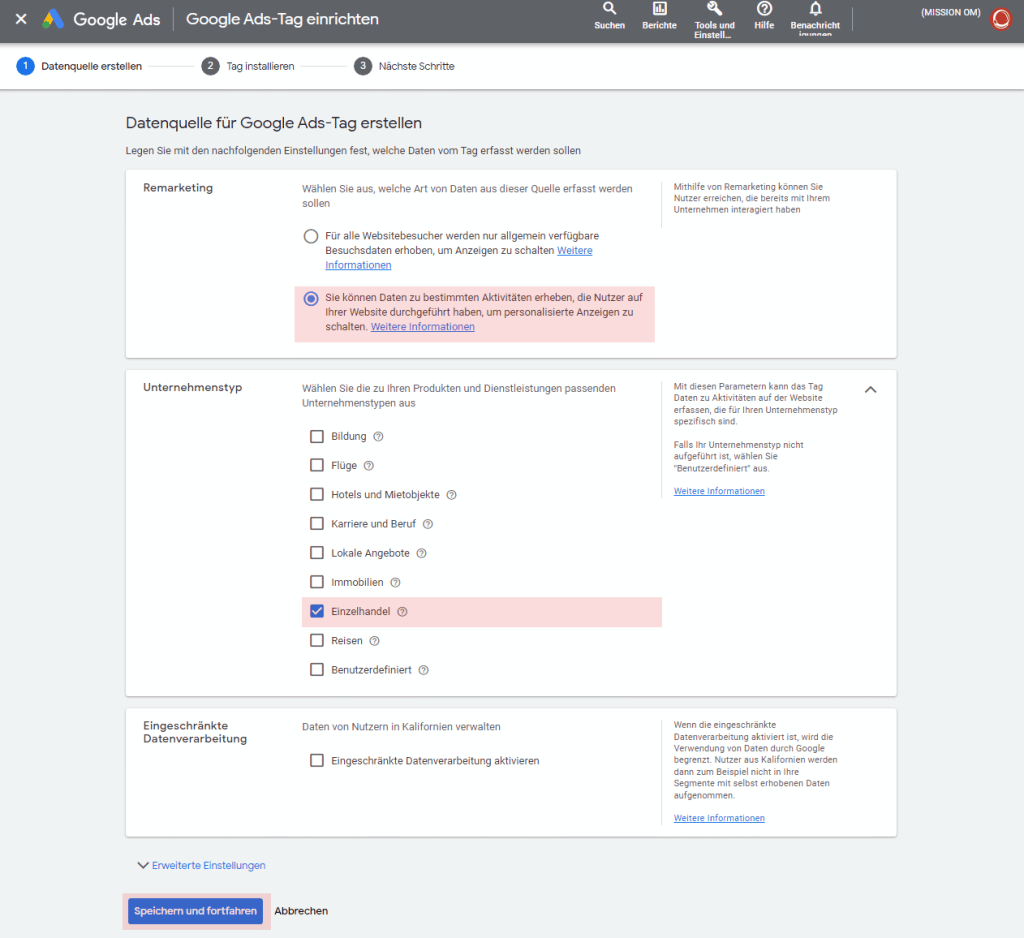
Wählen Sie die zweite Option in der Sektion Remarketing aus „Sie können Daten zu bestimmten Aktivitäten erheben, die Nutzer auf Ihrer Website durchgeführt haben, um personalisierte Anzeigen zu schalten.„. Bei der zweiten Sektion Unternehmenstyp müssen Sie „Einzelhandel“ auswählen. Anschließen auf den Button „Speichern und fortfahren“.
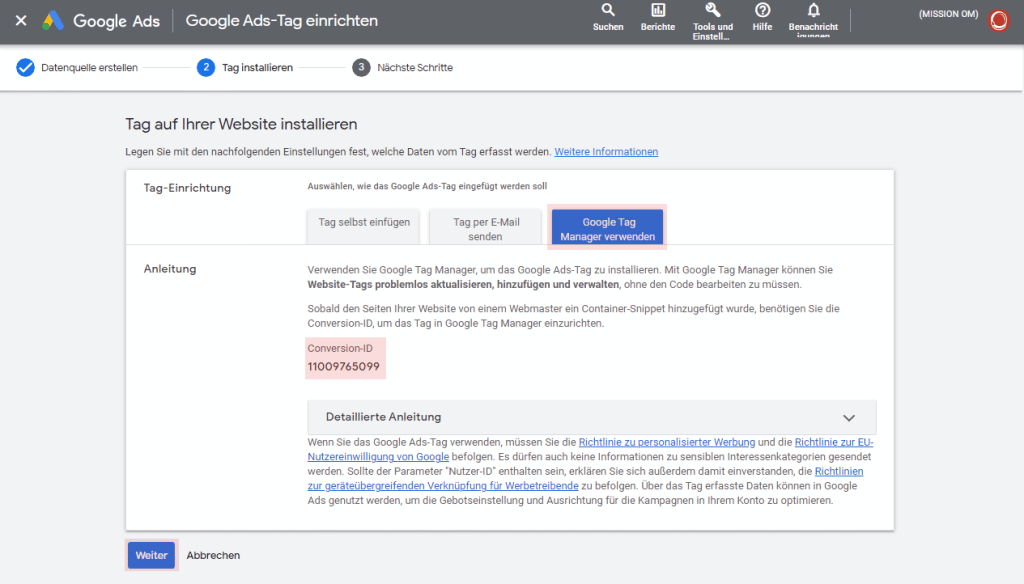
Klicken Sie auf den Tab „Google Tag Manager verwenden“ und notieren Sie sich die „Conversion-ID„. Nun können Sie auf den Button „Weiter“ klicken. Die Konfiguration ist in Google Ads damit Abgeschlossen. Bitte beachten Sie, dass Sie noch die Einrichtung im Google Tag Manger vornehmen müssen!

